
A Hands-On Guide for Shared-Cost Postcard Agency Owners
If you’re running a co-op shared-cost postcard agency, delivering your clients’ ads is only half the job — the other half is getting your postcards ready for USPS drop-off the right way.
In this guide, you’ll learn exactly how to prepare your EDDM (Every Door Direct Mail) postcards for shipping, avoid common mistakes, and impress both your advertisers and your local post office.
Step 1: Select Routes & Pay Online
First, head to eddm.usps.com.
Sign in with your USPS account, choose your ZIP code, and select the routes you want to target.
- Filter by residential or business
- Use demographic filters like age, income, and household size
- USPS will calculate how many addresses you’re mailing to
- Pay online for a smoother drop-off experience
Pro Tip: USPS Retail EDDM allows up to 5,000 mailers per day without a permit. If you exceed that, pay over multiple days — it’s allowed!
Step 2: Print Required Paperwork & Facing Slips
Once you pay for your routes: Click “Print All Forms”
You’ll get:
- A master list of routes
- EDDM Retail Facing Slips
- Summary page with route names and counts.
You’ll need 1 facing slip per 100 postcards, so print extras!
You’ll also need to fill in:
- Number of bundles (e.g., 7 bundles for 684 addresses)
- Pieces per bundle (usually 100)
- Postcard weight (ask your printer or use a small scale)
Sign it, and you’re ready.
Step 3: Unbox & Prepare Your Postcards
Once you receive your printed postcards from the printer, start by carefully unboxing them. Be gentle — don’t use a knife that could accidentally slice through the cards. If your printer shipped them in a USPS-approved tray or tub, save that container — you can reuse it when you drop the bundles off at the post office.
Spread the postcards out on a clean, flat surface like a table or floor, and separate them by campaign if you’re running more than one.
If your printer didn’t pre-bundle the postcards for EDDM, you’ll need to do it yourself:
If your printer didn’t pre-bundle the postcards for EDDM, you’ll need to do it yourself:
Group them into bundles of 100
Use rubber bands or plastic straps to secure each bundle
For any leftover bundle (e.g., 83 cards), band it separately
Make sure the EDDM Retail indicia is facing up — USPS clerks and carriers rely on that mark during sorting
💡 Pro Tip:
Bundling takes time, and mistakes here can cause USPS to reject your mail. That’s why I recommend choosing a printer that offers EDDM-ready bundling as part of their service. It saves a lot of effort and ensures accuracy.
If you’d rather skip this manual step, check out our recommended list of printers that handle bundling for EDDM postcards — available in our article on how to design and print EDDM postcards.
Step 4: Insert Facing Slips into Each Bundle
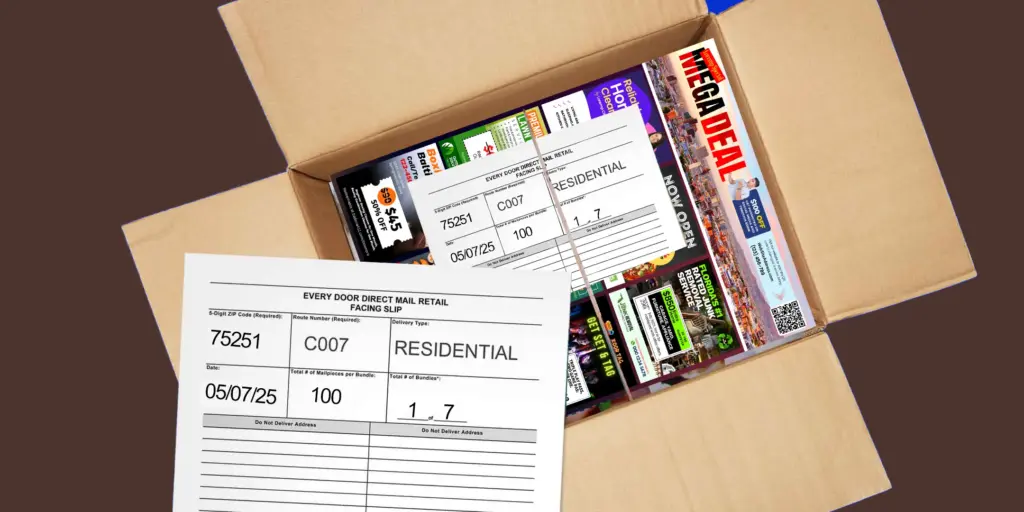
Now that your postcards are bundled, the next step is to insert a facing slip on top of each one. This slip tells USPS exactly which route the bundle belongs to and how many pieces are inside. USPS provides these slips after you complete your online order, or you can download blank ones anytime from this USPS page. Fill out each slip with the correct route number, date, and bundle count, then place it face-up on top of the corresponding bundle. Secure each bundle with a rubber band, making sure the slip stays flat and clearly visible. This is a required USPS step — and missing or incorrect slips can lead to delays or even rejection of your mailing. So take a moment to double-check every slip before moving on to the next step.
- A printed facing slip Labeled “1 of 7”, “2 of 7”, etc.
Optional: Use a stamp or write your agency name on each slip.
Step 5: Final Step Before Dropping Off Your EDDM Mail
Now that you’ve completed the facing slips and attached them to your 7 bundles — great job! You’re almost ready to take them to the post office.
But there’s one last important step you need to take:
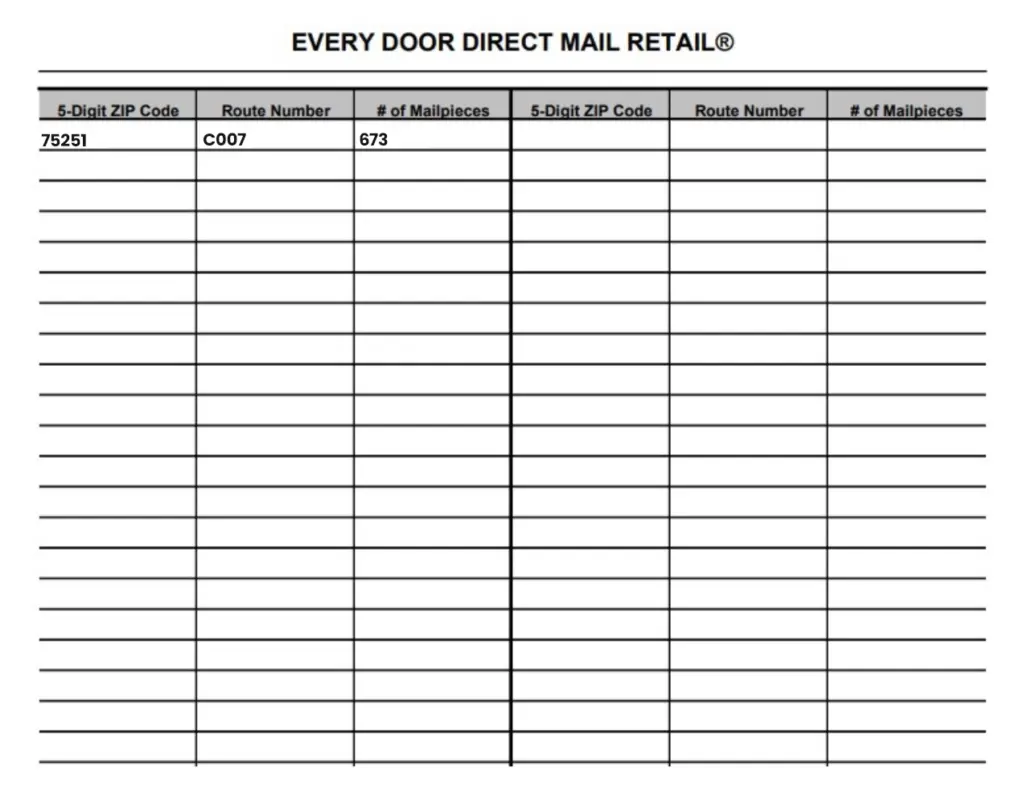
You must include a Master Slip (also known as a Route Summary Slip) on top of your bundles.
Here’s what to do:
Place one Master Slip per route at the top of each group of bundles, inside the tray or tub.
If you’re mailing to multiple routes, you’ll need a separate Master Slip for each route.
Group the bundles by route and place the appropriate Master Slip on top of each group.
Step 6: Drop Off at the Correct Post Office
Each USPS route corresponds to a specific post office. You can find this info on the EDDM tool sidebar (“Post Office Drop-offs”).
At drop-off:
If your selected routes belong to different delivery ZIP codes or post offices, you must drop off each group of bundles at the corresponding Destination Delivery Unit (DDU) — that means the specific post office that delivers mail to that route.
USPS’s EDDM Retail tool will show you which post office each route belongs to during the checkout process.
This step ensures your mail reaches the right neighborhoods without delays.
Now you’re all set — just bring your sorted bundles to the correct post offices, and you’re good to go!
Ask when the postcards will be delivered — it’s usually the next business day!
And that’s it — your cards are officially in the mail!
Bonus Tips for Easier Fulfillment
- Over 5,000 pieces? Pay across multiple days, or stagger drop-offs
- Too heavy to haul? Schedule USPS pickup or rent a local truck
Want to Start Your Own EDDM Agency the Easy Way?
Our EDDM Starter Kit gives you everything you need to run your own co-op postcard agency — even if you’re starting from scratch.
What You Get:
- 4 professionally designed Canva EDDM templates (9×12 + jumbo)
- 50+ editable coupon ads for multiple industries
- A ready-to-launch WordPress agency website
- Signup form with payment support
- Setup tutorials, strategy videos, and free demo install
Save time. Look professional. Get paid upfront.
Grab your starter kit now at 9x12agency.com
Final Thoughts
Preparing EDDM mailers might seem technical at first, but once you’ve done it once, it’s fast and repeatable.
And when you’re offering done-for-you service to local advertisers, your ability to confidently handle fulfillment sets you apart from the amateurs.
Get organized, follow the checklist, and deliver results your clients can hold in their hands.
