
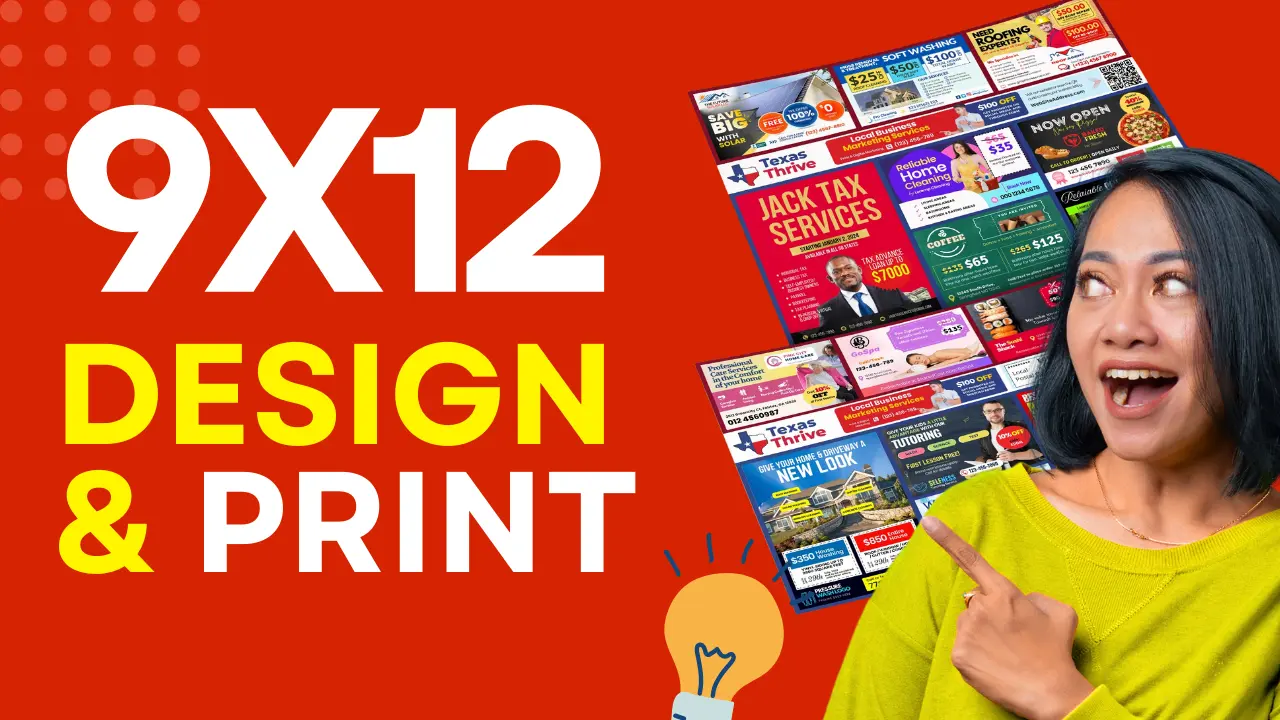
A practical guide to creating a professional mailer, collecting advertiser artwork, and getting to print without the headaches
You’ve sold your ad spots. Payments are collected. Now comes the part that most new agency owners stress about more than they need to: putting the actual postcard together.
Here’s the reality, design and print is the most straightforward part of running a 9x12 agency. The process is predictable, the tools are affordable, and with the right templates, you can have a print-ready file in a single afternoon.
Most of this lesson applies wherever you run campaigns. Layout, artwork collection, bleed, colour mode and print files work the same in Sydney as they do in Ohio. Two things do change by country — the maximum size your postal service will carry, and what has to appear on the mailing panel — so both are called out as we go.
Understanding the Postcard Layout
A 9x12 co-op postcard is essentially a grid. The front is divided into ad blocks, each block belongs to one advertiser. The back contains the mailing panel — the reserved area your postal service requires you to leave clear — and sometimes additional ad space.
Common layout formats:
| Format | Size | Metric | Ad Spots | Best For |
|---|---|---|---|---|
| Standard 9x12 | 9″ × 12″ | 228.6x304.8mm | 8–18 spots | Neighbourhoods under 10,000 homes |
| Jumbo 12x15 | 12″ × 15″ | 304.8x381mm | 12–24 spots | Larger campaigns, more revenue per run |
| 6.5x12 | 6.5″ × 12″ | 165.1x304.8mm | 4–16 spots | Smaller markets, lower entry price |
Each layout has a front (ads) and a back (mailing panel + additional ads or branding). In the United States the back must follow USPS EDDM specifications — the indicia, address block and barcode placement are fixed requirements. Other postal services reserve the panel differently, and some ask for far less than USPS does.
If you’re using the 9x12 Agency CRM, your layout templates are already built to spec. You choose a layout, assign slots to advertisers, and the system handles the structure. All you need to do is drop in the artwork.
Before You Design: Will Your Format Actually Mail?
Every postal service caps the size of an unaddressed article, and the caps are not the same. Check this before you sell a single spot — it is a miserable conversation to have after the money is collected.
Australia is a good worked example, because the numbers are published. Australia Post’s Unaddressed Mail service has a Large category with a ceiling of 260x360mm, a 20mm thickness limit and a 100g weight ceiling. Measured against that:
| Format | Metric size | Australia Post Large (260x360mm) |
|---|---|---|
| Standard 9x12 | 228.6x304.8mm | Fits, with about 31mm and 55mm to spare |
| 6.5x12 | 165.1x304.8mm | Fits comfortably |
| Jumbo 12x15 | 304.8x381mm | Does not fit — 45mm too wide and 21mm too long |
So an Australian agency can run the standard 9x12 or the 6.5x12 exactly as designed, but the Jumbo is off the table without special approval. Weight is rarely the constraint: a 9x12 card on heavy 350gsm stock lands around 24g, well under the 100g ceiling.
If you’re outside the US and Australia, get these five numbers from your postal service before you design:
- Maximum length and width for an unaddressed article
- Maximum thickness
- Maximum weight per article
- Whether irregular or non-rectangular shapes are allowed
- What must be left clear on the mailing panel
Our Australia guide works through all five for Australia Post, and we have the same breakdown for Canada and the UK.
Step 1: Choose Your Layout Template
Don’t design from scratch. Use a template built specifically for 9x12 co-op mailers, one that already has the correct dimensions, bleed lines, a compliant back panel, and clearly labelled ad placeholder zones.
Option 1: 9x12 Agency Canva Templates. Our Agency Starter Bundle includes professionally designed Canva templates in multiple layouts, 8-spot, 12-spot, and double-size configurations, with everything pre-labelled and sized correctly. Open in Canva, drop in the artwork, export as PDF. Done.
Option 2: 9x12 Agency CRM built-in layouts. If you’re running campaigns through the CRM, your layout is already part of the campaign setup. You define the grid, assign slots, set pricing, and the layout is rendered automatically. Clients can even submit their design directly through the booking flow using the built-in Canva template library.
Option 3: Design from scratch in Canva or Adobe. Possible, but not recommended for your first campaign. You’ll spend hours on spacing and bleed that templates already solve. Save that time for client outreach.
Step 2: Understand Ad Spot Sizes
Each layout has different ad spot dimensions. Before you collect artwork from advertisers, or design ads yourself, you need to know the exact dimensions for each spot type.
Common ad spot sizes for a standard 9x12 layout:
| Spot Type | Approximate Size | Metric | Notes |
|---|---|---|---|
| Single spot | 2.75″ × 2.5″ | 70x64mm | Standard unit |
| Double spot (horizontal) | 5.75″ × 2.5″ | 146x64mm | 2 single widths |
| Double spot (vertical) | 2.75″ × 5.25″ | 70x133mm | 2 single heights |
| Quad / Premium | 5.75″ × 5.25″ | 146x133mm | Premium placement, higher price |
These dimensions vary slightly depending on your layout and the number of spots. Always pull the exact dimensions from your template file and share them with advertisers when collecting artwork.
If your local format differs from the US standard, you are not stuck with these numbers. Canva designs can be resized to any dimensions, so premium CRM users can take any ad template from the library and output it at whatever slot size your layout uses.
Step 3: Collect Artwork from Advertisers
Once spots are sold and paid, you need artwork from each advertiser. This is where most new agency owners lose time, chasing files, getting low-res images, receiving the wrong dimensions.
Set expectations upfront. When a client books, send them a clear one-page artwork spec sheet that includes:
- Exact dimensions for their spot (state the units you work in, plus pixels at 300 DPI)
- Accepted file formats: JPG or PNG at 300 DPI, or PDF
- Deadline: artwork must be submitted by [date] to make the print run
- What to include: logo, headline, phone number, website, offer or CTA
Pro tip: Give advertisers a deadline that’s 5–7 days before your actual print deadline. This buffer is for revisions, missing files, and the inevitable last-minute submitter.
What to Do When Advertisers Don’t Have Artwork
This happens constantly, especially with small local businesses that have never advertised professionally.
You have two options:
Option 1: Design it for them (for a fee). A design add-on of roughly $50–$150 per ad, or the equivalent in your currency, is an easy upsell that adds meaningful revenue to each campaign. If you’re using our Agency Starter Bundle, you have 50+ pre-designed industry ad templates in Canva, open the right one, swap in the client’s logo and phone number, export, done. Most designs take 15–20 minutes.
Option 2: Direct them to the Canva template library. If you’re running your campaigns through the 9x12 Agency CRM, clients can choose their own ad template from a library organised by industry, dentists, roofers, lawn care, and more, and customise it themselves directly in Canva after booking. No files to chase. No emails back and forth. The design shows up in your dashboard when it’s ready.
This alone saves hours of coordination per campaign.
Step 4: Assemble the Final Layout
Once all artwork is collected, it’s time to build the final print file.
In Canva:
- Open your template
- Click each ad placeholder zone
- Upload or paste the advertiser’s artwork into the correct slot
- Make sure nothing bleeds into neighbouring ad zones
- Check that all text is legible at print size (nothing under 8pt)
- Verify the back panel, mailing area, any back-side ads
Quality checklist before export:
- [ ] All images are 300 DPI or higher
- [ ] No advertiser artwork intrudes on the reserved mailing panel
- [ ] Bleed extends 0.125″ (3mm) beyond all edges
- [ ] All fonts are embedded or converted to outlines
- [ ] Colour mode is CMYK (not RGB, RGB looks different when printed)
- [ ] File is saved as PDF/X-1a or high-quality PDF for print
If you’re working in Canva, export as “PDF Print“, Canva handles most of the technical requirements automatically.
What Goes on the Mailing Panel
This is the part that genuinely differs by country, and getting it wrong can mean a rejected lodgement.
United States (USPS EDDM): the indicia, address block and barcode area are fixed requirements with defined placement. Follow your template.
Australia (Australia Post Unaddressed Mail): noticeably lighter. The article must not carry the recipient’s name and address. A “To The Householder” salutation is optional. A “Postage Paid” imprint is optional too — but if you use one, do not put the word “Priority” in or near it. Do not print a return address: there is no return-to-sender service for unaddressed mail, so it only wastes space.
Everywhere else: ask your postal service what must be left clear, what wording is required, and whether a postage imprint is mandatory or optional. Get it in writing before you print thousands of cards.
Step 5: Choose the Right Printer
Use a printer that understands large-format direct mail postcards. They’ll know the size requirements, panel placement, and bundling options that make lodgement or drop-off smooth.
What to ask any printer, anywhere:
- Can you print and cut to my exact finished size?
- Do you offer bundling in the lots my postal service requires? (saves hours of manual work)
- What file format do you require for upload? (usually PDF)
- What’s the turnaround time once files are approved?
- Do you add the postal imprint, or do I include it in my artwork?
Always order a small test print for your first campaign to check colour accuracy before committing to your full run.
United States: printers we’ve priced
See the full US size and spec guide for how these formats are built.
PrintPapa. printpapa.com
- Offers 9x12 and 12x15 EDDM formats: $1105 USD for 5000 pieces (updated 26 June 2026)
- Bundles in stacks of 100 save you bundling time at home ($175 and an extra 2 days)
- Affordable pricing, USPS-ready output
BlockbusterPrint, blockbusterprint.com
- High-quality 9x12 EDDM printing, 5000 pieces for $960 USD (updated 26 June 2026)
- Bundles in stacks of 100 ($210 and an extra 2 days)
- Fast turnaround options available
GotPrint, gotprint.com
- High-quality 9x12 EDDM printing, 5000 pieces for $799 USD (updated 26 June 2026)
- They don’t offer bundling in stacks of 100
- Competitive pricing on large quantities
Outside the United States
The US printers above are set up around USPS EDDM sizes, and shipping thousands of cards internationally will wipe out any saving. Print locally instead. Search for a commercial or trade printer offering large-format postcards or flyers at your finished size, and take them the five numbers from the section above. In Australia, for example, your printer does not need to know anything about EDDM — they need to hit your finished size within the Australia Post Large category and, ideally, bundle in lots of 50 or 100.
Step 6: Work Out Your Print and Mailing Cost
Your print cost is one of your main expenses and it sets your profit margin. The structure of the sum is the same everywhere:
(print cost + postage cost) vs (spots sold × price per spot)
Only the rates change. Here is a worked example using US figures:
Example: 9x12 campaign, 5,000 homes (United States, USD)
| Item | Estimated Cost |
|---|---|
| Print (5,000 postcards) | $799–$1300 |
| USPS postage (EDDM retail) | ~$1110 |
| Total cost | ~$1909–$2410 |
If you have 10 advertisers each paying $295, your campaign revenue is $5,310. After $1909 in costs, your profit is roughly $3,401.
That’s the 9x12 model working as designed. You pocket the difference between what advertisers pay and what it costs to print and mail. As you fill more spots and optimise your pricing, that margin grows.
To build the same table for your own market, get a print quote at your finished size and quantity, then request a postage quote from your postal service — most do not publish unaddressed rates openly, and price varies by size, weight and service level. Do both before you set your ad spot prices, then set up your campaign in your own currency in the CRM.
Step 7: Submit Your Print File
Once your file is ready:
- Go to your printer’s website and select your postcard size and quantity
- Upload your PDF file
- Review the online proof carefully, check colours, alignment, and text
- Approve and pay
- Note your estimated delivery date and work backward to your drop-off or lodgement date
Timeline to plan for:
| Step | Typical Time |
|---|---|
| Artwork collection | 5–7 days |
| Layout assembly | 1–2 days |
| Print turnaround | 5–10 business days |
| Hand-off to delivery | 3–5 business days (US EDDM drop-off) |
Total from “fully sold” to “in mailboxes” is roughly 3 weeks in the US.
Build in your country’s booking lead time. Some postal services need notice well before the mail date. Australia Post, for instance, closes standard Unaddressed Mail bookings at 11.59pm on the tenth business day before the Monday of the delivery week, and won’t accept changes after that — which pushes an Australian campaign closer to four weeks end to end, and means spots must close earlier than a US agency would expect.
Tell advertisers upfront: “Our mail date is [date], artwork is due by [date].” This sets professional expectations and reduces last-minute chaos.
A Note on Design Quality
Your postcard is your portfolio. Every home that receives it sees your agency’s work. Every advertiser on it is judging whether to rebook based on how their ad looks.
A few design principles that make a 9x12 card work:
Less text, more impact. Each ad spot is small. A phone number, one headline, and a strong visual is more effective than cramming in a paragraph.
Consistent spacing. Equal margins between ad zones make the card look professional and organised.
One clear call to action per ad. Phone number, website, or QR code — not all three.
High contrast. Ads need to be readable at a glance. Dark text on light background, or light text on a strong colour — avoid muddy mid-tones.
If you’re using our Canva ad templates from the Agency Starter Bundle, these principles are already baked in. The templates are designed to look great at print size without any design experience required.
Ready for the Next Step?
Your postcard is designed, approved, and on its way from the printer. Now you need to get it into the postal network — bundling, paperwork, and hand-off.
→ United States: continue to Lesson 5, How to Prepare Your EDDM Mailers for USPS Drop-Off
→ Australia: see Australia Post Unaddressed Mail, which covers booking, bundling and lodgement end to end.
→ Canada: see Canada Post Neighbourhood Mail — note the size limits are tighter than the US.
→ United Kingdom: see Royal Mail Door to Door — a 9x12 card will not fit flat, so read this before you design.
Need the tools to design and launch faster? Our Agency Starter Bundle includes Canva postcard templates in multiple layouts, 50+ industry ad designs, and a ready-to-launch agency website. Running multiple campaigns? The 9x12 Agency CRM handles bookings, payments, and client ad design in one platform, in your own currency.
→ Run bookings, payments and client ad designs from one place: start free on 9x12 CRM.
Next read: 9x12 postcard size, paper and USPS EDDM specs · EDDM vs. mailing lists for shared-cost postcards

One Response
Can I get a price on5000 and 10000 postcards.